Click here to send us an email. Click here to call us.

Author: Amy Riley

As we bid farewell to another year and eagerly await the arrival of a new one, it’s time to celebrate in style. Whether you’re hosting a grand New Year’s Eve party or having an intimate gathering with friends and family, one thing is for sure – a delicious appetiser is a must! This year, let’s add a burst of freshness and flavour to your celebrations with a classic recipe that never fails to impress: Tomato Basil Bruschetta.

Ingredients:

  • 1 baguette, sliced
  • 4-5 ripe tomatoes, diced
  • 1/4 cup fresh basil, chopped
  • 2 cloves garlic, minced
  • 1/4 cup extra virgin olive oil
  • 1 tablespoon balsamic vinegar
  • Salt and pepper to taste
  • 1/2 cup grated Parmesan cheese (optional)

Instructions:

  1. Preheat the Oven: Preheat your oven to 375°F (190°C).
  2. Prepare the Baguette: Arrange the baguette slices on a baking sheet. Toast them in the preheated oven until golden brown, usually about 5-7 minutes. Keep an eye on them to avoid burning.
  3. Mix the Tomatoes and Basil: In a bowl, combine the diced tomatoes, chopped basil, minced garlic, olive oil, balsamic vinegar, salt, and pepper. Gently toss the ingredients until well combined. Allow the mixture to marinate for at least 15 minutes to let the flavours meld.
  4. Assemble the Bruschetta: Once the baguette slices are toasted and slightly cooled, spoon the tomato and basil mixture generously onto each slice. If you’re feeling indulgent, sprinkle a bit of grated Parmesan cheese on top for an extra layer of richness.
  5. Serve and Enjoy: Arrange the bruschetta on a festive platter, and watch as your guests delight in the explosion of flavours with each bite. The combination of juicy tomatoes, aromatic basil, and the crunch of the toasted baguette is a perfect way to kick off the New Year’s festivities.
  6. Pairing Suggestion: Complement your Tomato Basil Bruschetta with a sparkling wine or champagne to add an extra touch of elegance to your celebration.

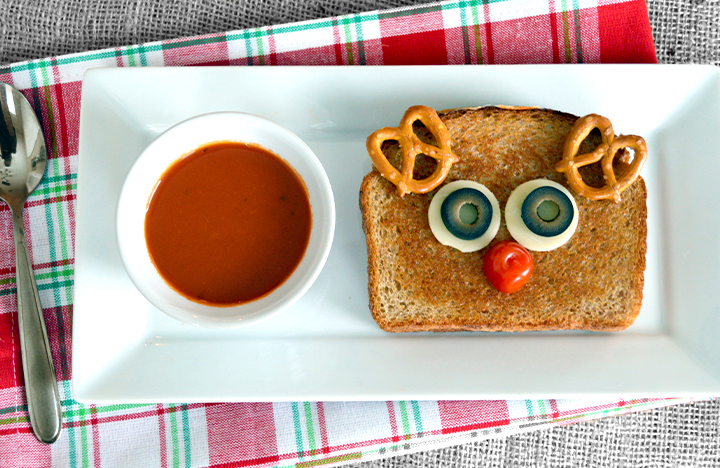
This Rudolph Cheese Toastie with Tomato Soup is not only a festive and creative meal but also a comforting and flavourful combination. Enjoy the gooey cheese toastie alongside the warmth of the tomato soup for a delightful winter treat for those colder December nights!

Ingredients:

For the Rudolph Cheese Toastie:

  • 4 slices of whole-grain bread
  • 8 slices of your favourite cheese (cheddar or Swiss work well)
  • 1 red bell pepper
  • 1 black olive
  • Butter for spreading

For the Tomato Soup:

  • 1 tablespoon olive oil
  • 1 onion, finely chopped
  • 2 cloves garlic, minced
  • 2 cans (28 oz each) crushed tomatoes
  • 2 cups vegetable broth
  • 1 teaspoon dried basil
  • 1 teaspoon dried oregano
  • Salt and pepper to taste
  • 1/2 cup heavy cream (optional, for a creamier soup)
  • Fresh basil for garnish (optional)


Method:

For the Rudolph Cheese Toastie:

  1. Prepare the Ingredients: Preheat your pan or toastie maker and cut the red bell pepper into small circles to represent Rudolph’s nose then slice the black olive into thin rounds for Rudolph’s eyes.
  2. Assemble the Cheese Toastie: Butter one side of each slice of bread. On the non-buttered side of two slices, place the cheese slices .Add the red bell pepper circle near the top of one slice to represent Rudolph’s nose. Place two olive slices above the red pepper circle as eyes. Top with the other slice of bread, buttered side facing out.
  3. Cook the Toastie: Cook the assembled sandwich in a pan or sandwich press until the bread is golden brown, and the cheese is melted.
  4. Shape the Toastie: Once cooked, use a round cookie cutter or a knife to shape the top of the sandwich into reindeer antlers.
  5. For the Tomato Soup: In a large pot, heat olive oil over medium heat. Add chopped onions and garlic, sauté until softened.
  6. Add Tomatoes and Broth: Pour in the crushed tomatoes and vegetable broth. Stir well. Then add dried basil, dried oregano, salt, and pepper. Stir to combine.
  7. Simmer: Bring the soup to a simmer, then reduce the heat to low. Let it simmer for about 20-25 minutes, allowing the flavours to meld.
  8. Serve: Ladle the tomato soup into bowls and garnish with fresh basil if desired.

These mini quiches are not only visually appealing but also a burst of flavours with the sweetness of caramelised onions, the tanginess of cherry tomatoes, and the creamy richness of goat cheese. Perfect for entertaining or as a savoury treat for yourself!

Ingredients:

For the Crust:

  • 1 cup all-purpose flour
  • 1/2 cup cold unsalted butter, cubed
  • 1/4 teaspoon salt
  • 2-3 tablespoons ice water

For the Filling:

  • 1 tablespoon olive oil
  • 1 large onion, thinly sliced
  • 1 tablespoon balsamic vinegar
  • 1 cup cherry tomatoes, halved
  • 1/2 cup crumbled goat cheese
  • 4 large eggs
  • 1 cup milk
  • Salt and pepper to taste
  • Fresh basil leaves for garnish (optional)


Method:

  1. Prepare the Crust: In a blender, combine the flour, cold cubed butter, and salt. Pulse until the mixture resembles coarse crumbs.
  2. Add ice water one tablespoon at a time, pulsing until the dough just comes together. Be careful not to overmix.
  3. Turn the dough onto a lightly floured surface, gather it into a ball, flatten into a disc, and wrap it in plastic wrap. Refrigerate for at least 30 minutes.
  4. Preheat the oven to 190°C.
  5. Roll out the chilled dough on a floured surface and cut into rounds that will fit your mini quiche pans or muffin tin.
  6. Press the dough rounds into the mini quiche pans or muffin tin, trimming any excess.
  7. Caramelise the Onions: In a skillet, heat olive oil over medium heat. Add the thinly sliced onions and cook, stirring occasionally, until softened and golden brown.
  8. Stir in balsamic vinegar and continue cooking for an additional 2-3 minutes until the onions are caramelised. Remove from heat.
  9. Assemble the Quiches: Distribute the caramelised onions evenly among the mini quiche pans or muffin tin. Place halved cherry tomatoes on top of the onions and sprinkle crumbled goat cheese over the tomatoes.
  10. Prepare the Egg Mixture: In a bowl, whisk together the eggs, milk, salt, and pepper until well combined.
  11. Pour the egg mixture over the tomatoes, onions, and goat cheese in each quiche pan.
  12. Bake in the preheated oven for 20-25 minutes or until the quiches are set and the edges are golden brown. Allow the mini quiches to cool for a few minutes before carefully removing them from the pans.

‘Tis the season!

As we get into the Christmas spirit, we’ll be sharing the tastiest tomato Christmas recipes with you to enjoy with your loved ones this festive season. Gather your family and friends around to enjoy these adorable and delicious Mini Christmas Tree Pizzas with Tomato Baubles. They make for a festive and tasty addition to your holiday celebrations!

 Ingredients:

  •       1 package of pre-made pizza dough or your favourite homemade pizza dough
  •       1/2 cup pizza sauce
  •       1 1/2 cups shredded mozzarella cheese
  •       Cherry tomatoes, halved (for baubles)
  •       Fresh basil leaves (for tree branches)
  •       Black olives, sliced (for tree trunks)
  •       Olive oil for brushing
  •       Salt and pepper to taste


Method:

  1.     Preheat the Oven: Preheat your oven according to the instructions on the pizza dough package or to 220°C.
  1.     Prepare the Dough: If using pre-made pizza dough, follow the package instructions for rolling it out. If you’re using homemade dough, roll it out on a floured surface into a large rectangle.
  1.     Cut Out Christmas Trees: Use a Christmas tree-shaped cookie cutter or a knife to cut out Christmas tree shapes from the rolled-out dough. Place the tree shapes on a baking sheet lined with parchment paper.
  1.     Add Sauce and Cheese: Spread a thin layer of pizza sauce on each tree, leaving a border around the edges. Sprinkle shredded mozzarella cheese over the sauce.
  1.     Decorate with Tomato Ornaments: Place halved cherry tomatoes on the trees as “baubles.” Get creative with colours and patterns!
  1.     Create Basil Branches: Arrange fresh basil leaves on each tree to represent branches. You can layer them to give a fuller appearance.
  1.     Add Olive Trunks: Slice black olives into thin rounds and place them at the bottom of each tree as trunks.
  1.     Season and Brush with Olive Oil: Sprinkle a pinch of salt and pepper over the trees for added flavour. Lightly brush the exposed edges of the dough with olive oil for a golden crust.
  1.     Bake: Bake in the preheated oven for 10-15 minutes or until the crust is golden, and the cheese is melted and bubbly.
  1.   Serve: Carefully transfer the mini Christmas tree pizzas to a serving platter. Allow them to cool for a few minutes before serving.

Tomatoes, with their juicy goodness and versatile uses, have earned a cherished spot in our kitchens and gardens. As we embark on a Tomato Talk, let’s address some of the most common questions about this beloved fruit. From cultivation to culinary applications, we’ve got your tomato queries covered!

  1. How Do I Grow Tomatoes Successfully?

Cultivating tomatoes is a rewarding venture, and success starts with the basics:

  • Sunshine Lover: Tomatoes thrive in sunlight. Ensure your plants receive at least 6-8 hours of direct sunlight daily.
  • Well-Drained Soil: Plant tomatoes in well-draining soil to prevent waterlogging, a common woe for these plants.
  • Watering Wisely: Keep the soil consistently moist, but avoid overwatering. Irregular watering can lead to issues like blossom end rot.
  • Support Systems: Many tomato varieties benefit from staking or caging to support their growth and prevent sprawling.
  1. Why Do My Tomatoes Have Cracks?

Cracked tomatoes can be a bit disappointing, but understanding the causes can help prevent this issue:

  • Inconsistent Watering: Fluctuations in watering, especially irregular watering followed by heavy watering, can lead to cracks.
  • Variety Matters: Some tomato varieties are more prone to cracking. Consider growing crack-resistant varieties.
  • Weather Factors: Rapid changes in weather, particularly fluctuations in temperature and humidity, can contribute to cracking.
  1. Can I Grow Tomatoes in Containers?

Absolutely! Container gardening is a fantastic option, especially for those with limited space. Here’s how to make it successful:

  • Choose the Right Container: Opt for large containers with good drainage to accommodate the tomato’s root system.
  • Quality Soil: Use high-quality potting soil that provides the necessary nutrients.
  • Support the Plant: Many compact or determinate tomato varieties do well in containers. Use stakes or cages for support.
  1. How Can I Ripen Green Tomatoes?

Sometimes you find yourself with a bounty of green tomatoes. Fear not, as you can ripen them indoors:

  • Paper Bag Method: Place green tomatoes in a paper bag with a ripe banana. The ethylene gas from the banana speeds up ripening.
  • Windowsill Ripening: Arrange green tomatoes on a sunny windowsill, and they’ll gradually ripen.
  1. What’s the Best Way to Store Tomatoes?

Proper storage ensures your tomatoes stay fresh and flavourful:

  • Room Temperature: Keep fully ripe tomatoes at room temperature for the best flavour. Only refrigerate if they’re overripe and need to be used soon.
  • Separate from Fruits: Store tomatoes away from fruits like bananas and apples, as these release ethylene gas, which can hasten ripening.

This Tomato, Avocado, and Chickpea Salad with Balsamic Vinaigrette is a delightful and nutritious lunch option. It’s packed with the fresh, vibrant flavours of ripe tomatoes and creamy avocado, combined with the heartiness of chickpeas. The balsamic vinaigrette adds a zesty, tangy kick, making this salad a perfect, well-balanced meal.

Ingredients:

For the Salad:

2 large ripe tomatoes, diced

1 ripe avocado, diced

1 can (14 oz) chickpeas, drained and rinsed

1/2 red onion, finely chopped

1/4 cup fresh basil leaves, chopped

1/4 cup fresh parsley, chopped

Salt and black pepper to taste

For the Balsamic Vinaigrette:

3 tablespoons extra-virgin olive oil

2 tablespoons balsamic vinegar

1 clove garlic, minced

1 teaspoon Dijon mustard

Salt and black pepper to taste

Method:

Step 1 – Prepare the Balsamic Vinaigrette: In a small bowl, whisk together the extra-virgin olive oil, balsamic vinegar, minced garlic, and Dijon mustard. Season with salt and black pepper to taste. Set the vinaigrette aside.

Step 2 – Assemble the Salad: In a large salad bowl, combine the diced tomatoes, diced avocado, chickpeas, finely chopped red onion, fresh basil, and fresh parsley. Gently toss the ingredients to mix them evenly.

Step 3 – Dress the Salad: Drizzle the prepared balsamic vinaigrette over the salad. Toss gently to coat the ingredients with the vinaigrette. Be careful not to mash the avocado.

Step 4 – Season and Serve: Season the salad with additional salt and black pepper to taste. Mix well and ensure all the flavours are nicely blended.

In the vast world of tomatoes, the Piccolo variety stands out as a petite powerhouse of flavour. These small, vibrant tomatoes may be diminutive in size, but their taste packs a punch that rivals their larger counterparts. In this blog, we delve into the unique characteristics, cultivation tips, and culinary delights offered by the charming Piccolo tomato.

  1. Tiny Marvels of Flavour:

Piccolo tomatoes, aptly named for their small size, typically measure about one inch in diameter. Despite their petite stature, these tomatoes are bursting with intense, sweet, and tangy flavours. The concentrated taste is often described as a delightful blend of sweetness and acidity, making them a favourite among tomato enthusiasts.

  1. Appearance and Varieties:

Piccolo tomatoes come in various colours, with red and yellow being the most common. The red Piccolo tomatoes exhibit a classic tomato hue, while the yellow variety offers a bright and sunny alternative. Both types share the same rich flavour profile. Their round shape and glossy skin contribute to their visual appeal, making them an attractive addition to salads and culinary presentations.

  1. Cultivation Tips:

Growing Piccolo tomatoes can be a rewarding experience, whether you’re a seasoned gardener or a novice. Here are some cultivation tips to ensure a thriving Piccolo tomato plant:

  • Container Gardening: Piccolo tomatoes, being compact plants, adapt well to container gardening. Choose a pot with good drainage and fill it with nutrient-rich soil.
  • Sunlight Requirements: Like their larger counterparts, Piccolo tomatoes thrive in full sunlight. Ensure they receive at least six to eight hours of direct sunlight daily for optimal growth and fruit development.
  • Watering: Keep the soil consistently moist, avoiding waterlogging. Mulching around the base of the plant helps retain moisture and regulate soil temperature.
  • Support and Pruning: Provide support for the plants, especially when they start bearing fruit. Stake or cage the plants to prevent sprawling. Regular pruning of excess foliage encourages better air circulation and minimizes the risk of diseases.
  1. Culinary Delights:

The versatility of Piccolo tomatoes extends to the kitchen, where their intense flavour elevates a variety of dishes. Here are some culinary delights to explore:

  • Fresh Salads: Add a burst of flavour to salads by tossing in halved Piccolo tomatoes. Their vibrant colours and rich taste complement greens and other vegetables.
  • Bruschetta: Create a classic bruschetta by combining diced Piccolo tomatoes with garlic, basil, olive oil, and a pinch of salt. Serve on toasted bread for a simple yet delightful appetizer.
  • Pasta Sauces: Piccolo tomatoes make excellent pasta sauces. Simmer them with garlic, onions, and herbs for a quick and flavourful tomato sauce.

The Piccolo tomato variety is a testament to the idea that good things often come in small packages. From their intense flavour to their adaptability in cultivation, Piccolo tomatoes have earned a special place in the hearts of gardeners and food enthusiasts alike. Whether enjoyed fresh in salads or incorporated into a variety of dishes, these tiny marvels never fail to deliver a burst of summer goodness. Consider introducing the Piccolo tomato to your garden or kitchen for a delightful experience that proves great flavour knows no size.

Are you looking for a comforting winter snack? This Winter Tomato Bruschetta is the perfect plate, offering a burst of freshness and flavour during the colder months. The combination of ripe tomatoes, aromatic basil, and the slight tang of balsamic vinegar is a delightful contrast to the warm, toasted baguette. Whether you serve it at a winter gathering or simply as a cozy snack by the fireplace, it’s sure to brighten your winter days!

Ingredients:

4 ripe Roma tomatoes, diced

1/4 cup red onion, finely chopped

2 cloves garlic, minced

1/4 cup fresh basil, chopped

2 tablespoons extra-virgin olive oil

1 tablespoon balsamic vinegar

Salt and pepper to taste

1 French baguette, sliced into 1/2-inch thick rounds

1/4 cup vegan or regular cream cheese (optional)

Method:

Step 1 – Prepare the Tomato Topping: In a bowl, combine the diced tomatoes, red onion, minced garlic, and fresh basil. Drizzle extra-virgin olive oil and balsamic vinegar over the mixture. Season with salt and pepper to taste. Gently toss to combine all the ingredients. Set aside and allow the flavours to meld while you prepare the baguette slices.

Step 2 – Toast the Baguette: Preheat your oven’s broiler or a toaster oven. Place the baguette slices on a baking sheet and lightly toast them under the broiler for 1-2 minutes on each side, or until they become golden brown.

Step 3 – Spread Cream Cheese (Optional): If you’d like to add a creamy layer to your bruschetta, spread a thin layer of vegan or regular cream cheese on each toasted baguette slice.

Step 4 – Top with Tomato Mixture: Spoon a generous portion of the tomato topping onto each baguette slice. Make sure to include a good balance of tomatoes, onions, and fresh basil.

Step 5 – Serve: Arrange your winter tomato bruschetta on a serving platter, and garnish with additional fresh basil leaves. These can be enjoyed immediately while they’re still warm.

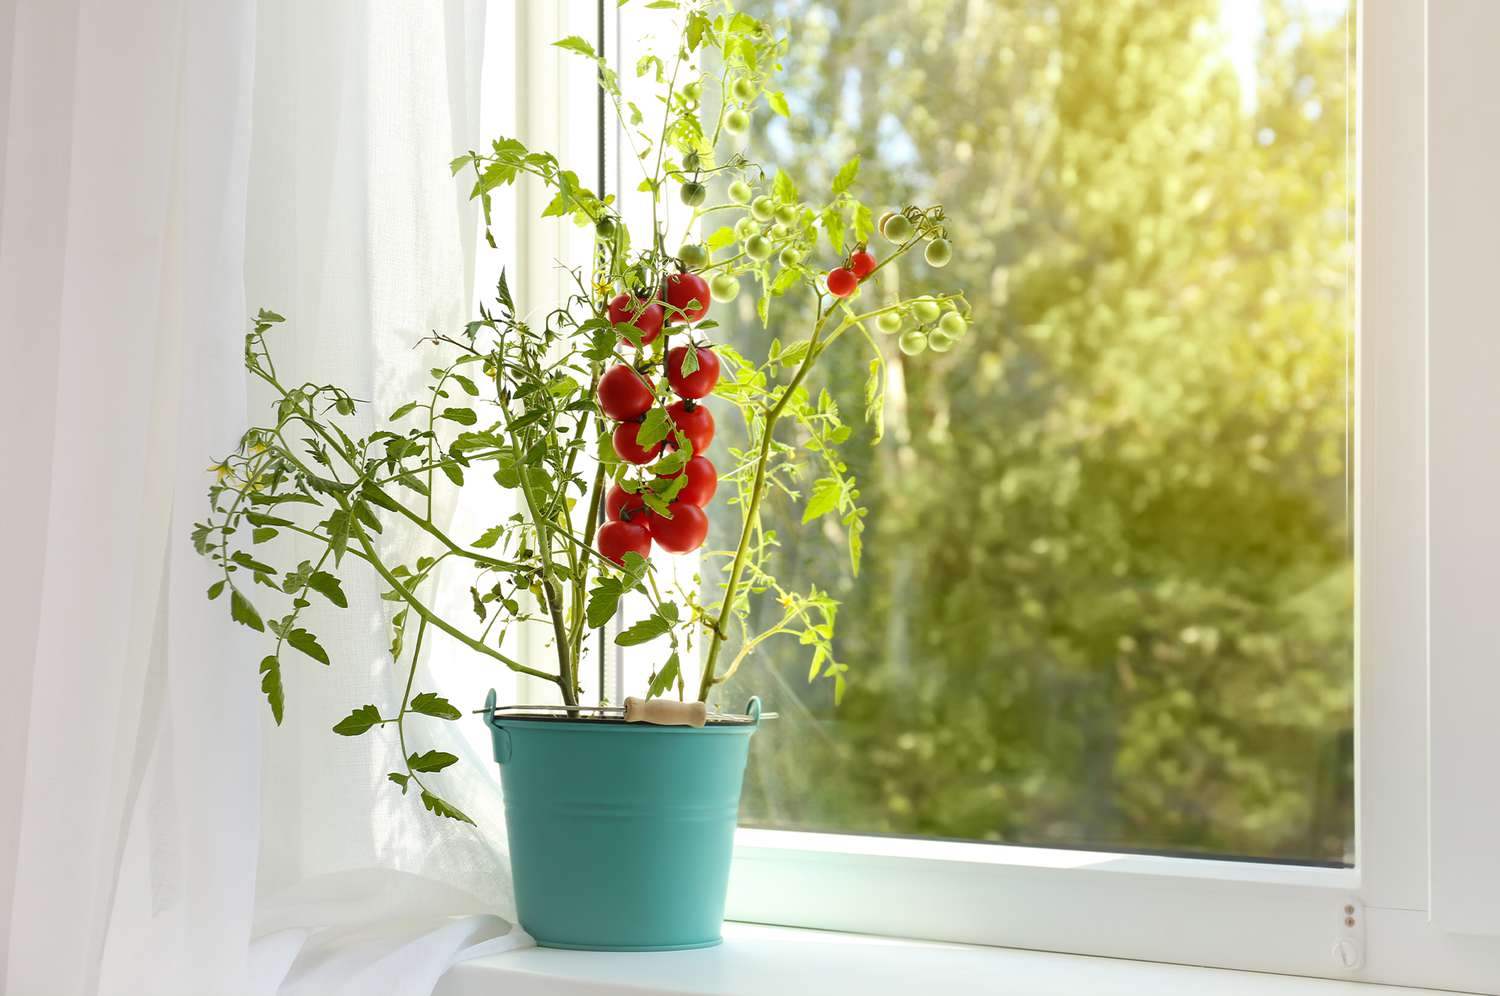
While winter typically signals a slowdown in gardening, cultivating tomatoes at home during the colder months is not only possible but incredibly rewarding. With a bit of planning and the right techniques, you can enjoy the juicy goodness of homegrown tomatoes even when the snow is falling outside. In this guide, we’ll explore the steps to successfully grow tomatoes indoors during the winter months.

  1.  Selecting Tomato Varieties:

Choose tomato varieties that are well-suited for indoor growing. Compact or dwarf varieties work best, as they adapt well to container gardening. Cherry tomatoes, such as Tiny Tim or Micro Tom, are popular choices for indoor cultivation due to their smaller size and shorter growing season.

  1. Choosing the Right Containers:

Opt for containers with good drainage to prevent waterlogging. Use nutrient-rich, well-aerated potting soil that retains moisture. Consider self-watering containers to maintain consistent soil moisture levels. Each tomato plant should ideally have a container with a minimum size of 5 gallons.

  1. Providing Adequate Light:

Light is crucial for indoor tomato plants, especially during winter when natural sunlight is limited. Place your containers near a south-facing window to maximize sunlight exposure. Additionally, supplement natural light with artificial grow lights, placing them 6-12 inches above the plants for 12-16 hours per day. High-quality LED or fluorescent lights work well for this purpose.

  1. Optimising Temperature and Humidity:

Tomatoes thrive in temperatures between 65°F and 75°F (18°C to 24°C). Ensure your indoor space maintains these temperatures, avoiding drafts and sudden temperature fluctuations. Use a humidity tray or humidifier to maintain a humidity level of around 50-70%, as tomatoes appreciate slightly higher humidity.

  1. Pollination Techniques:

In the absence of outdoor pollinators, you may need to assist in the pollination process. Gently shake the plants or use a small, soft brush to transfer pollen between flowers. This mimics the action of bees and helps ensure proper fruit development.

  1. Feeding and Watering:

Use a balanced, water-soluble fertiliser to provide essential nutrients to your tomato plants. Feed them every 2-3 weeks during the growing season. Water consistently, keeping the soil evenly moist but not waterlogged. Adjust watering frequency based on the specific needs of your tomato variety.

  1. Pruning for Productivity:

Regularly prune your tomato plants to encourage airflow and prevent the development of diseases. Pinch off suckers (side shoots) to direct the plant’s energy toward fruit production. Additionally, remove any yellowing or damaged leaves.

Happy gardening!

Happy National Nacho Day!

To celebrate National Nacho Day, try out this tomato nachos recipe. They are a delightful combination of fresh and zesty flavours, making for a vibrant, satisfying snack or appetiser, and the juicy tomato base adds a unique twist to this classic dish. Enjoy the burst of tomato goodness in every bite!

Tomato nachos are a refreshing twist on the classic nacho dish. They are packed with flavour, and the tomatoes add a burst of juiciness to every bite. This recipe is perfect for a quick snack or appetiser for gatherings.

Ingredients:

4 large ripe tomatoes, sliced into rounds

1 cup tortilla chips

1 cup vegan or regular shredded cheese (cheddar, Monterey Jack, or a blend)

1/2 cup black beans, cooked and drained

1/2 cup corn kernels (fresh, frozen, or canned)

1/4 cup sliced black olives

1/4 cup diced red onion

1/4 cup chopped fresh cilantro

1 jalapeño pepper, thinly sliced (optional, for some heat)

1/2 teaspoon ground cumin

1/2 teaspoon chili powder

Salt and pepper to taste

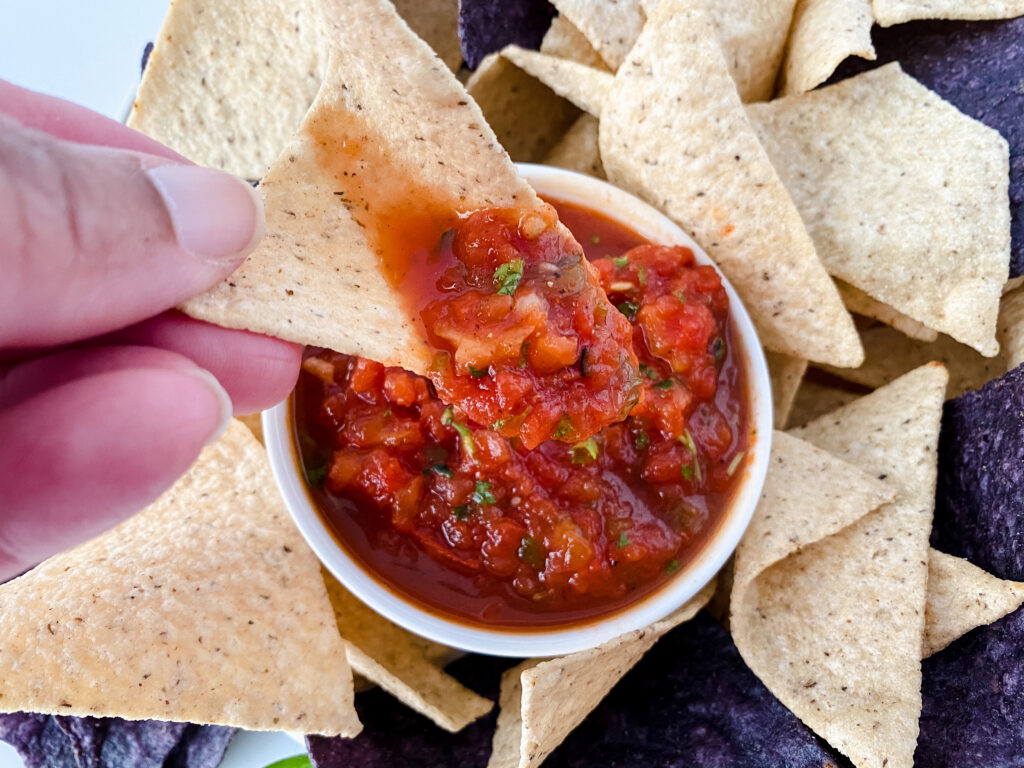
Guacamole and salsa for serving


Method:

Step 1 – Preheat the Oven: Preheat your oven to 175°C.

Step 2 – Prepare the Tomatoes: Place the tomato rounds on a paper towel to remove excess moisture. This will prevent your nachos from becoming soggy. Season each tomato round with a pinch of salt and pepper.

Step 3 – Assemble the Nachos: On a large baking sheet or ovenproof platter, arrange the tomato rounds in a single layer. Layer each tomato round with tortilla chips, a sprinkle of shredded cheese, black beans, corn kernels, sliced black olives, and diced red onion. You can layer the ingredients more than once to create multiple tiers of nachos.

Step 4 – Season: Evenly sprinkle ground cumin and chili powder over the nachos for added flavour. If you like it spicy, add the jalapeño slices.

Step 5 – Bake: Place the nachos in the preheated oven and bake for about 10-12 minutes or until the cheese is melted, and the toppings are heated through.

Step 6 – Serve: Remove the tomato nachos from the oven and sprinkle them with fresh cilantro. Serve them with guacamole and salsa on the side for dipping.